
What Is Cold Frame Gardening and Why It’s Perfect for Extending Your Growing Season
Cold frame gardening is a simple yet effective technique that uses a transparent-topped enclosure to protect plants from adverse weather conditions while allowing sunlight to enter. Essentially, it’s a bottomless box with a clear lid that creates a microclimate by trapping solar heat during the day and insulating plants at night. Unlike greenhouses, cold frames don’t require electricity or complex construction, making them perfect for gardeners at any skill level. They’re particularly valuable for extending your growing season by 4-8 weeks in both spring and fall, allowing you to start seeds earlier, harden off seedlings safely, and continue harvesting cold-hardy vegetables like kale, spinach, and carrots well into winter. You’ll appreciate how cold frames bridge the gap between indoor and outdoor growing environments, providing just enough protection to keep plants thriving during transitional seasons while maintaining the natural benefits of outdoor cultivation. By implementing this centuries-old gardening method, you’re essentially creating a pocket of growing potential that defies your local climate calendar.
Recommended Products
Durable PP Material: Crafted from high quality polypropylene to resist rust and oxidation; provides sturdy support for all weather garden protection; safe to handle without risk of skin irritation

Spacious Walk-in Greenhouse: 11 x 8.5 x 7.5 FT large space accommodates 20-30 medium plants, vegetables, herbs and flowers; the walk-in tunnel design with generous headroom provides comfortable space to tend, prune and care for your plants year-round.

10 Essential Cold Frame Designs for Every Garden Size and Budget

Ready to extend your growing season with a cold frame but not sure which design suits your needs? These ten versatile options range from budget-friendly DIY projects to more elaborate structures, ensuring there’s something for every gardener.
Recommended Products

Frost King V76H Shrink Window Kit 84-Inch by 110-Inch, Clear

Enhanced Window Seal for Maximum Protection: Our window sealing tape provides an airtight barrier to keep out pollen, drafts, dust, and moisture. Ideal for window insulation for summer, it helps maintain indoor temperature and reduce energy costs. Also, when pollen season ahead, it helps you to keepp away from sneezing and coughing at home.

①Including one piece of 120cm X 160cm transparent film,one roll of adhesive loop straps(2.5cm width), one roll of adhesive hook straps(2.5cm width) and one manual inside.Film thickness is about 180㎛(0.18mm or 7mil),enough to agiast strong winds.Fits for windows smaller than 120cm X 160cm.
DIY Wooden Cold Frame Plans Using Recycled Windows
Transform old windows into productive garden assets with this classic cold frame design. Salvaged windows make perfect transparent tops for cold frames, providing excellent insulation while allowing ample sunlight to reach your plants. Build a simple box frame from untreated cedar, pine, or cypress boards (avoid pressure-treated lumber for food-growing spaces). Size your base to match your window dimensions, creating a sloped top that faces south for maximum sun exposure. Add hinges to the window for easy access and ventilation on warmer days. This project typically costs $20-50 if using recycled materials and offers exceptional durability, often lasting 5+ years with basic maintenance.
Easy-to-Build PVC Pipe Cold Frame Structures
Create a lightweight, portable cold frame using PVC pipes and plastic sheeting for under $30. This design features a simple rectangular frame made from ½-inch or ¾-inch PVC pipes connected with corner fittings. Cover the structure with 6-mil greenhouse plastic or clear vinyl, securing it with PVC clips or zip ties. The beauty of this design lies in its versatility—you can easily adjust dimensions to fit your garden beds and disassemble it for storage during summer months. For added stability, insert the bottom pipes a few inches into the soil or attach them to a wooden base. While not as insulating as wooden frames, these structures work exceptionally well for season extension in moderate climates and can be enhanced with additional row cover inside for extra frost protection.
Brick and Glass Cloche-Style Cold Frames
Construct a charming, Victorian-inspired cold frame using reclaimed bricks and a glass top. Arrange bricks in a rectangular pattern, mortaring them together for stability, with the north side higher than the south to create a sloped top that maximizes sun exposure. Top with old window sashes, shower doors, or custom-cut glass panels. This design offers exceptional thermal mass—the bricks absorb heat during the day and release it slowly overnight, providing superior protection during cold snaps. While more labor-intensive to build, these structures can last decades with minimal maintenance and add architectural interest to your garden industry.
Straw Bale Instant Cold Frames
Create an instant cold frame with just straw bales and an old window or clear plastic. Arrange four straw bales in a rectangle, place your transparent cover on top, and you’ve got a functioning cold frame in minutes. This method costs approximately $20-30 and provides excellent insulation as the straw gradually decomposes, generating additional warmth. The interior space naturally shrinks over time as bales break down, making this perfect for shorter crops like lettuce and spinach. When spring arrives, repurpose the partially decomposed straw as garden mulch—creating a zero-waste growing solution.
Concrete Block Modular Cold Frames
Build a durable, customizable cold frame using concrete blocks arranged in a rectangle. This design requires no tools or construction skills—simply stack blocks to your desired height, typically 2-3 courses, creating a structure that can be expanded or reduced as needed. The hollow cores of concrete blocks provide insulation while the thermal mass helps moderate temperature fluctuations. Top with old windows, polycarbonate panels, or heavy-duty clear plastic supported by wooden frames. This utilitarian design costs approximately $30-60 depending on size and can withstand harsh weather conditions for many seasons.
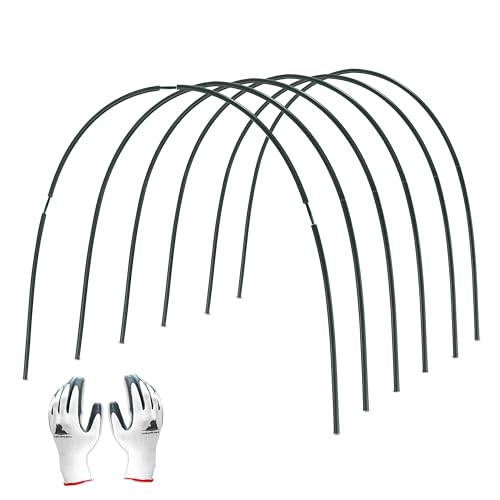
Hoop House Mini Cold Frames
Fashion low-profile cold frames using metal or flexible PVC hoops covered with greenhouse plastic. Create arches over existing garden beds by inserting ends of 4-6 foot lengths of ½-inch PVC pipe or 9-gauge wire into the soil at regular intervals. Cover with clear 6-mil greenhouse plastic, securing edges with soil, industry staples, or lumber. These structures cost $15-25 per bed and allow direct sowing in early spring while protecting seedlings from frost. Their low height (typically 12-18 inches) makes them ideal for leafy greens, root vegetables, and other compact crops, while their lightweight design allows for easy installation and removal.
Pallet Collar Cold Frames
Repurpose wooden pallet collars into instant raised bed cold frames. These standardized wooden frames stack perfectly to create garden beds of various heights, and when topped with old windows or polycarbonate panels, transform into excellent cold frames. Each collar typically costs $10-15 (or free if salvaged), making this an affordable option that requires minimal modifications. Simply place the collar where you want your cold frame, fill with soil, and add your transparent lid with hinges for access. The modular nature allows you to adjust the height based on your crops’ needs by adding or removing collars.
Window Well Bubble Cover Cold Frames
Repurpose clear plastic window well covers into instant cold frames for existing garden beds. These dome-shaped covers, designed to protect basement window wells, create perfect mini-greenhouses when placed over smaller plantings. Available at hardware stores for $15-30 each, they require zero construction and can be quickly positioned and removed as needed. Their curved shape sheds snow and rain effectively while maximizing growing space. Secure them to the ground using industry staples or by placing bricks around the edges. While not suitable for larger garden areas, these covers work brilliantly for protecting individual valuable plants or small clusters of seedlings.
Cold Frame Greenhouse Attachment
Extend your greenhouse functionality with an adjoining cold frame that serves as a transition zone. Build a low-walled frame against the south-facing wall of your existing greenhouse, creating a stepped growing area with different temperature zones. Construct using lumber and polycarbonate panels that match your greenhouse aesthetic, ensuring the top slopes away from the greenhouse wall for proper drainage. This design, while more expensive ($75-150 depending on materials), maximizes growing potential by creating a perfect hardening-off space for seedlings before transplanting outdoors. The temperature gradient provides flexibility for growing plants with different climate requirements.
Solar-Powered Automatic Vent Cold Frames
Upgrade any cold frame design with solar-powered automatic vent openers that prevent overheating. These ingenious devices ($30-60) use wax that expands when heated by the sun, automatically opening the lid when temperatures rise and closing it as temperatures fall—no electricity required. Install on any hinged cold frame lid to ensure proper ventilation without daily monitoring, preventing the common problem of plants being damaged on unexpectedly warm days. This technology turns a basic cold frame into a self-regulating system that requires minimal oversight, making it perfect for busy gardeners or those who can’t check their gardens daily.
7 Best Vegetables to Grow in Your Cold Frame Year-Round

Cold frames provide the perfect environment for growing vegetables throughout the year, even during winter months when traditional gardening isn’t possible. Here are seven vegetables that thrive with cold frame protection:
Recommended Products

Specification & Perfect Fit: You'll receive 50 pieces of greenhouse clips crafted from durable ABS plastic. Designed to securely fit 20mm outer‑diameter small greenhouse tubing. Precision‑fitted inner diameter for a tight, long‑lasting grip. Always double‑check your tube's outer diameter for hassle‑free installation.

Critical Sizing Note - Please Read Before Buying: This 3/4" PVC tee has an actual inner diameter of 1.050 inches (26.67 mm). It is specifically designed to fit standard 3/4" PVC SCH40 pipes, which have an outer diameter (OD) of 1.050" (26.67 mm). Please measure your pipe's OD to ensure it matches 1.050" before ordering. If your pipe's outer diameter measures only 0.75", this fitting will be too large
Great formaking cold frames, Greenhouse, shelters, row covers.
1. Spinach
Spinach is one of the most cold-hardy leafy greens you’ll find, capable of surviving temperatures down to 15°F (-9°C) when protected in a cold frame. You can sow spinach seeds directly in your cold frame in late summer or early fall for continual harvests throughout winter. The insulation of the cold frame keeps the soil from freezing solid, allowing spinach roots to remain active. For best results, choose winter varieties like ‘Tyee’ or ‘Bloomsdale Long Standing’ that are specifically bred for cold tolerance.
2. Kale
Kale becomes sweeter after exposure to frost, making it perfect for cold frame cultivation. This nutritional powerhouse continues growing in temperatures as low as 20°F (-6°C) when sheltered. Varieties like ‘Winterbor’ and ‘Red Russian’ perform exceptionally well in cold frames. Plant kale at least 4-6 weeks before your first expected frost to establish strong roots before winter sets in. The cold frame will protect the plants from harsh winds while allowing them to benefit from the cold-induced sweetening process.
3. Carrots
Carrots make excellent cold frame vegetables because the insulated environment prevents the ground from freezing deeply, allowing continued growth and harvest throughout winter. Sow carrot seeds in late summer, targeting varieties bred for winter growing like ‘Napoli’ or ‘Merida.’ The cold frame environment allows carrots to develop their natural sugars as temperatures drop, resulting in exceptionally sweet roots. You can harvest them as needed throughout winter, essentially using your cold frame as a natural refrigerator that keeps them fresh and growing.
4. Lettuce
With cold frame protection, lettuce can provide fresh salad greens even in the middle of winter. Focus on cold-hardy varieties like ‘Winter Density,’ ‘Arctic King,’ or ‘North Pole.’ The key to winter lettuce success is planting in succession every 2-3 weeks starting in late summer. Your cold frame will protect lettuce from freezing temperatures, snow, and ice while allowing sufficient light for growth. For continuous harvests, use the “cut and come again” method, removing only outer leaves while allowing the plant’s center to regrow.
5. Radishes
Radishes are perfect for cold frames due to their quick growth cycle and cold tolerance. Winter varieties like ‘China Rose’ and ‘Black Spanish Round’ can be sown directly in your cold frame in early fall for harvest throughout winter. These cool-season crops actually develop better flavor in cold conditions, becoming less spicy and more crisp. With a cold frame, you can continue succession planting radishes every 10-14 days for a steady supply of these crunchy vegetables even when snow covers the ground.
6. Scallions
Scallions (green onions) are surprisingly resilient in cold frames and provide fresh flavor throughout winter months. Plant bunching onion varieties like ‘Evergreen Hardy White’ or ‘Welsh Onion’ in late summer or early fall. Their slender form makes them ideal for maximizing cold frame space, and they’ll continue producing new growth as you harvest the outer stalks. Unlike many vegetables that go dormant in winter, scallions maintain steady growth in a cold frame environment, giving you fresh onion flavor year-round.
7. Swiss Chard
Swiss chard’s cold tolerance and vibrant colors make it both practical and attractive in your cold frame garden. Varieties like ‘Bright Lights’ or ‘Fordhook Giant’ add visual interest while providing nutritious greens throughout winter. Chard can withstand temperatures down to about 25°F (-4°C) when protected in a cold frame. Plant seeds at least 6 weeks before first frost to establish strong plants. The cold frame will protect the large leaves from damage while allowing continued harvests of the nutritious outer leaves throughout the coldest months.
5 Creative Ways to Automate Your Cold Frame Garden

Cold frame gardening becomes even more efficient when you incorporate automation. These smart answers can save you time while ensuring optimal growing conditions for your plants.
Recommended Products


Extends your gardening season

Temperature-Activated Lid: Innovative hinge with heat-sensitive wax automatically opens lid when temperatures exceed 70℉ and closes as it cools with no electricity needed
1. Solar-Powered Ventilation Systems
Solar-powered vent openers are game-changers for cold frame management. These ingenious devices use wax-filled cylinders that expand when heated by the sun, automatically pushing the lid open when temperatures rise above your set threshold. You’ll never need to worry about plants overheating during unexpected warm spells, as the system closes the vents when temperatures drop. Most solar vent openers can lift up to 15 pounds and require no electricity or batteries, making them truly sustainable additions to your garden setup.
2. Water Collection and Irrigation Systems
Integrate rainwater harvesting directly into your cold frame design by adding gutters along the edges that channel water into collection barrels. Connect these to drip irrigation systems with timers to deliver consistent moisture to your plants. Self-watering designs using capillary mats work exceptionally well in cold frames—these special fabrics draw water from a reservoir below and maintain perfect soil moisture levels. For the tech-savvy gardener, moisture sensors can trigger watering only when soil conditions require it, conserving water and preventing both drought and root rot.
3. Automated Shade Cloth Deployment
Install rolling shade cloths with temperature-sensitive triggers to protect tender plants from intense midday sun. These systems use bimetallic coils or electronic sensors to deploy shade coverage when light intensity reaches potentially harmful levels. The automatic shading prevents scorching and reduces water evaporation during warmer periods while maintaining optimal light levels for plant growth. Many systems can be programmed seasonally to adjust for changing sun angles and intensity throughout the year.
4. Smart Monitoring Systems
Transform your cold frame into a data-driven growing environment with wireless temperature and humidity sensors. These affordable devices connect to your smartphone, sending alerts when conditions fall outside ideal parameters. Some advanced systems can even track soil moisture, light levels, and air circulation patterns. The collected data helps you understand microclimate patterns within your cold frame, allowing for season-to-season improvements in your growing strategy. Many smart monitors can be integrated with other automation systems to create a responsive growing environment.
5. Thermal Mass Automation
Automated thermal mass systems regulate overnight temperatures in your cold frame without electricity. Water-filled black containers with programmable valves capture heat during daylight hours and gradually release it overnight. More sophisticated setups include phase-change materials that solidify and liquefy at exact temperatures, automatically absorbing or releasing heat as needed. These systems work along with insulating panels that deploy automatically at sunset to retain the accumulated warmth, ensuring your plants stay protected even during the coldest nights.
Strategic Cold Frame Placement Tips for Maximum Sun Exposure

The optimal placement of your cold frame is crucial for capturing maximum sunlight during winter months. Position your cold frame on the south or southeast side of your property where it will receive the most direct sunlight throughout the day. Avoid locations near trees or buildings that cast shadows, as even partial shade can significantly reduce temperatures inside your frame. For northern hemisphere gardens, angle your cold frame at approximately 45 degrees facing south to maximize sun exposure during winter’s low sun angle. Install reflective materials like aluminum foil or white paint on the interior north wall to bounce additional light onto your plants. Consider using a movable cold frame design that allows you to adjust positioning seasonally—placing it in partial shade during summer months if you’re extending growing into warmer seasons. For urban gardens, rooftops or balconies often provide unobstructed sun exposure that’s perfect for cold frames. Remember to leave enough space around your cold frame for easy access and maintenance, while ensuring it’s protected from strong winds that could reduce internal temperatures or damage the structure.
Recommended Products

Adjustable Shelf: The shelf in this mini greenhouse can be easily adjusted in height to accommodate various types of plants, meeting all your needs (It has four preset screw holes, but you can also create your own holes to customize the shelf height)

Natural Fir Frame: This greenhouse is made of a solid natural fir frame that ensures long-lasting durability. The polished surface allows you to personalize it with your own touch, such as painting or staining, creating a greenhouse that reflects your personal style. The polycarbonate panels not only provide excellent light transmission but also retain heat effectively.

Adjustable Shelf: The shelf in this mini greenhouse can be easily adjusted in height to accommodate various types of plants, meeting all your needs (It has four preset screw holes, but you can also create your own holes to customize the shelf height)
8 Common Cold Frame Gardening Mistakes to Avoid

Recommended Products
This product adds a great value
This product adds a great value
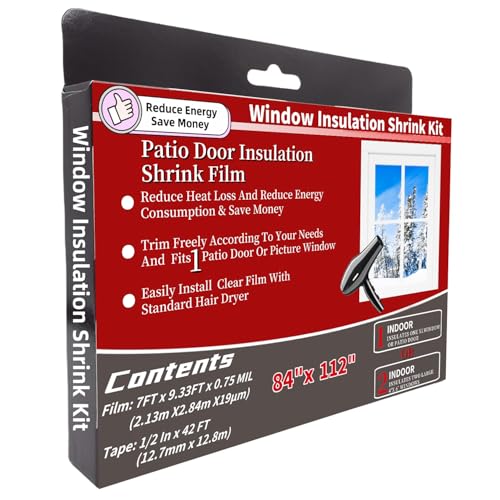
Including :84"x 112" Of Window Clear Shrink Film And 1/2 Inch x42 Feet Double Sided Tape
1. Neglecting Proper Ventilation
Poor ventilation is the number one killer of cold frame plants. Even on cold days, temperatures inside your frame can soar to 80°F or higher when the sun is shining. Always prop the lid open slightly on sunny days, even in winter, to prevent overheating. Consider investing in automatic vent openers that respond to temperature changes if you can’t monitor your cold frame throughout the day.
2. Inconsistent Watering
Cold frames create a sheltered environment where rainfall can’t reach your plants. Many gardeners forget their cold frame plants need regular watering, leading to stunted growth or crop failure. Check soil moisture twice weekly during active growing periods, and water thoroughly when the top inch feels dry. Remember that plants need less water in winter but shouldn’t completely dry out.
3. Choosing the Wrong Location
Placing your cold frame in a shady spot defeats its purpose. Your cold frame needs at least 6 hours of direct sunlight daily during winter months. Avoid north-facing positions or locations near tall structures that cast shadows. Also, don’t position your cold frame in low-lying areas where cold air settles, creating frost pockets that can damage plants.
4. Ignoring Temperature Management
Failing to monitor temperatures inside your cold frame can result in plant stress or death. Install a minimum-maximum thermometer to track temperature fluctuations. Aim to maintain daytime temperatures between 60-70°F and nighttime temperatures above 40°F for most crops. Add additional insulation like bubble wrap or straw bales around the frame during extreme cold snaps.
5. Overcrowding Plants
Cramming too many plants into your cold frame creates poor air circulation and increases disease risk. Space plants according to their mature size, just as you would in an outdoor garden. For leafy greens, allow 4-6 inches between plants; for root vegetables, provide 2-3 inches. Proper spacing ensures adequate light reaches all plants and reduces humidity problems.
6. Using Inadequate Materials
Constructing cold frames with flimsy materials leads to heat loss and structural failure. Avoid using thin plastic sheeting that tears easily or single-pane glass that offers minimal insulation. Instead, opt for 6mm polycarbonate panels, double-pane glass, or heavy-duty greenhouse plastic rated for UV resistance. Ensure wooden frames are made from rot-resistant lumber like cedar or treated pine.
7. Forgetting to Harden Off Plants
Transitioning seedlings directly from indoor growing conditions to a cold frame can shock plants. Always harden off seedlings gradually by placing them in the cold frame for increasing periods over 7-10 days. Start with just a few hours daily, then gradually increase exposure while monitoring for signs of stress like wilting or discoloration.
8. Neglecting Seasonal Maintenance
Many cold frame gardeners fail to clean and maintain their structures between seasons. Remove debris, disinfect surfaces with a 10% bleach solution at season’s end, and check for damaged parts. Clean glazing materials to maximize light transmission, and reseal any gaps where cold air might infiltrate. Proper maintenance extends your cold frame’s lifespan and ensures optimal growing conditions year after year.
Seasonal Planting Guide: What to Grow Each Month in Your Cold Frame

Your cold frame offers year-round growing opportunities when you know what to plant each month. In January and February, focus on cold-hardy greens like spinach, mâche, and claytonia that can withstand winter temperatures. March is perfect for starting cool-season crops including lettuce, radishes, and Asian greens, while April welcomes beets, carrots, and early peas. By May, transition to seedlings of warm-season vegetables like tomatoes and peppers, using the cold frame to harden them off. June through August are ideal for starting fall crops such as kale, collards, and broccoli. In September, plant quick-growing cool-season vegetables including arugula and mustard greens. October is prime time for winter salad mixes and spinach that will produce throughout winter. During November and December, maintain your existing cold-hardy crops and plant garlic for spring harvest. Remember to adjust watering and ventilation based on seasonal conditions to maximize your cold frame’s potential throughout the year.
Recommended Products
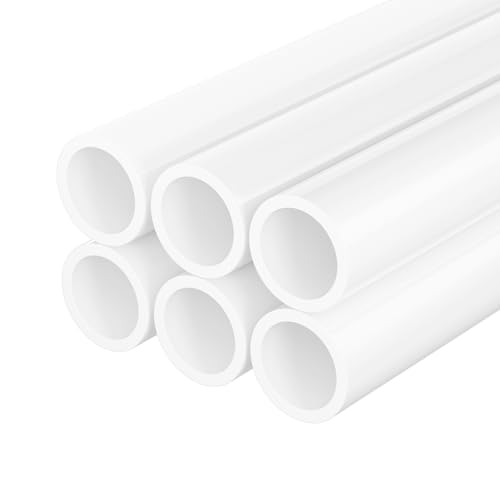
【Accurate 3/4 Inch SCH40 Size】Each package includes 6 pcs white 3/4 inch SCH40 PVC pipes, each pipe measures 17 inches long. Standard 3/4 inch SCH40 PVC pipe has a 1.05 inch outer diameter. Please confirm the actual pipe OD and fitting compatibility before purchase.


IMPORTANT SELECTION GUIDE: These screens are to fit on the OUTSIDE of a straight PVC or ABS pipe. Ensure you do not have a fitting or elbow on the end of your pipe. We have other style screens meant to go inside fittings and elbows.
How to Transition Between Seasons With Your Cold Frame Garden

Transitioning between seasons with your cold frame garden requires strategic planning and timing. In early spring, gradually increase ventilation time to acclimate seedlings to outdoor conditions, opening the lid for longer periods each day. When transitioning from spring to summer, remove the cold frame lid completely during the day to prevent overheating, eventually transitioning heat-loving plants to open garden beds. For summer to fall transitions, clean and disinfect your cold frame in late August, then reinstall it over cold-hardy vegetables before the first frost. When moving from fall to winter, add insulation with straw bales around the exterior, incorporate water jugs as thermal mass, and reduce watering frequency as plant growth slows. Install a thermometer inside to monitor temperatures and adjust ventilation accordingly. By following these seasonal transition techniques, you’ll maximize your cold frame’s effectiveness year-round and enjoy continuous harvests regardless of outside temperatures.
Recommended Products

Large Cold Frame: This greenhouse has a large size to provide enough space to organize your plants and small planting tools (Overall Dimension: 44.5" x 24.8" x 55.4")
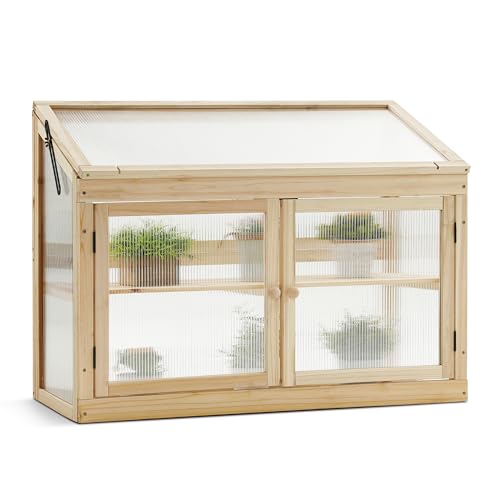
Adjustable Shelf: The shelf in this mini greenhouse can be easily adjusted in height to accommodate various types of plants, meeting all your needs (It has four preset screw holes, but you can also create your own holes to customize the shelf height)

【Flip-Top Roof & Efficient Ventilation】The sloped roof of this indoor greenhouse cabinet facilitates rapid drainage during rainfall, effectively preventing water accumulation. Side-mounted bolts allow the roof to be securely fixed in the open position, while the vent size can be precisely adjusted by repositioning screws along the support rod. This engineered configuration ensures a healthy ventilation system for optimal plant growth.
Conclusion: Taking Your Garden Beyond Traditional Growing Seasons
Cold frame gardening opens up a industry of possibilities for year-round growing regardless of your climate or experience level. By implementing these designs strategic placement techniques and automation options you’ll transform your garden into a productive space that defies seasonal limitations.
Whether you’re harvesting fresh kale in January starting seedlings weeks earlier than neighbors or experimenting with specialized crops cold frames provide that essential microclimate your plants need to thrive. The beauty lies in their simplicity and effectiveness – a centuries-old technique that still outperforms many modern gardening innovations.
Start small adapt as you learn and soon you’ll wonder how you ever gardened without this versatile tool in your arsenal. Your extended harvests and thriving plants will be the ultimate reward for your cold frame investment.
Recommended Products

COMMERCIAL GRADE THICKNESS – Engineered for superior durability, Ceblish heavy-duty polyethylene sheeting offering 50% more puncture resistance than standard 4 mil films. It provides a robust shield against hail, heavy rain, and strong winds, making it the ideal "armor" for your greenhouse, hoop house, or high tunnel construction projects.

Convenient access and ventilation:This mini greenhouse, a key gardening supply, features 2 semi - circular front windows for quick plant access. Open and roll them up for better airflow and light, fostering plant growth

Suitable Size: Our greenhouse replacement cover size is 63 x 27 x 19 inch, suitable size provides enough room for plants to grow while circulating air and maintaining humidity. COVER ONLY, FRAME IS NOT INCLUDED.