10 Creative Cinder Block Garden Ideas for Your Outdoor Space
Recommended Products

Size: 6x3x1FT; Quantity: 2Pack, accessories for both products packed in one box. The large planter box offers ample soil capacity to provide an ideal growing space for a variety of crops

Easy to Assemble: The galvanized garden beds outdoor manual includes a clear parts list and installation steps, which can save your time and assist you assemble the galvanized garden beds quickly.
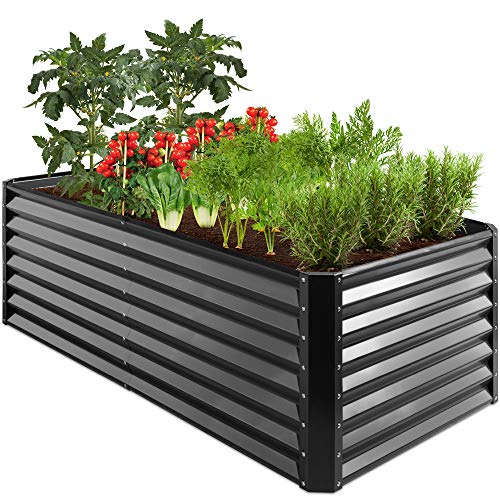
2FT GROWING DEPTH: 24 inches of depth holds up to 269 gallons of soil-great for medium to deep rooting plants and vegetables like broccoli, beans, and more; Note: This product does not include a bottom panel
1. Raised Garden Beds
Create affordable raised garden beds by arranging cinder blocks in a rectangle or square. Position the blocks with holes facing upward to plant herbs or flowers in the openings while using the center space for larger plants like vegetables or shrubs. This multi-level gardening approach maximizes your growing space and adds visual interest to your garden.
2. Vertical Garden Wall
Transform a plain fence or wall by stacking cinder blocks to create a striking vertical garden. Alternate the orientation of blocks to form planting pockets where you can grow cascading plants, succulents, or herbs. This space-saving solution works perfectly in small yards or patios and creates a living wall that serves as a stunning focal point.
3. Strawberry Tower
Build a productive strawberry tower by stacking cinder blocks in a pyramid formation. Plant strawberry seedlings in each opening, creating a compact growing system that keeps fruits elevated off the ground away from pests and rot. The concrete material retains heat, potentially extending your growing season for these sweet treats.
4. Outdoor Furniture
Construct durable outdoor seating by arranging cinder blocks as a base and topping them with weather-resistant cushions. Create simple benches, chairs, or even a coffee table using various configurations. This industrial-chic furniture withstands the elements and costs a fraction of store-bought outdoor pieces.
5. Fire Pit Surround
Design a safe, attractive fire pit by arranging cinder blocks in a circle. Line the interior with fire-resistant material for safety and add a metal fire bowl in the center. The blocks provide stability while creating a defined space for outdoor gatherings that can be enhanced with surrounding plantings.
6. Herb Garden Divider
Establish a functional garden divider by placing cinder blocks in a line with openings facing outward. Fill each cavity with herbs like basil, mint, thyme, and rosemary to create an accessible kitchen garden. This practical solution separates garden areas while providing easy access to fresh herbs for cooking.
7. Pond Border
Frame a small garden pond or water feature with cinder blocks arranged around the perimeter. Plant moisture-loving species in the openings to create a natural transition between water and land. The durable concrete withstands constant moisture and provides stability for your water feature’s edges.
8. Compost Bin Structure
Build an inexpensive compost bin by arranging cinder blocks in a square with one side open for access. The concrete material insulates the composting materials and the holes provide necessary airflow for decomposition. You’ll create nutrient-rich soil for your garden while keeping organic waste contained.
9. Garden Steps
Construct stable garden steps on a slope using staggered cinder blocks filled with soil. Plant ground covers or small flowering plants in the openings to create living steps that blend into your industry. This functional solution prevents erosion while adding accessible pathways through your garden.
10. Plant Shelf Display
Create a customizable plant display by stacking cinder blocks in an alternating pattern to form shelves. Arrange potted plants of various sizes on each level, using the block openings for smaller specimens. This adaptable structure can be expanded or reconfigured as your plant collection grows.
Building Raised Garden Beds With Cinder Blocks

Raised garden beds made from cinder blocks offer the perfect combination of durability and functionality for your garden space. These versatile structures create ideal growing conditions while adding architectural interest to your industry. Let’s explore how to build both simple and complex raised beds using cinder blocks.
Recommended Products

【36 Pocket Vertical Garden】Features 36 individual planting pockets, allowing you to grow herbs, flowers, succulents, strawberries, vegetables, and other plants while maximizing vertical space.

SPACE-SAVING VERTICAL GARDEN – Create a lush green wall with 12 plants in a compact 23.5"L x 25.5"H x 5.5"D frame, perfect for small apartments, patios, or balconies.
Wide Application: MEIWO newly upgraded hanging planter pockets are larger and deeper, making them perfect for growing flowers, vegetables, strawberries, and hanging plants. Plus, hanging planters double as handy organizers for your everyday essentials. Think about tools, keys, wallets, and even rulers.
Single-Tier Raised Beds for Beginners
Creating a single-tier raised bed is the perfect starting point for cinder block gardening. Simply arrange your blocks in a rectangle or square pattern, placing them with the holes facing upward to create additional planting spaces. For a standard 4’x8′ bed, you’ll need approximately 20-24 cinder blocks. No mortar is required—just level the ground, position your blocks, and fill with quality soil. The 8-inch height provides sufficient depth for most vegetables while keeping weeds at bay. Plant your main crops in the center and use the block holes for flowers, herbs, or companion plants that repel pests.
Multi-Tiered Designs for Advanced Gardeners
Take your garden to new heights with multi-tiered cinder block beds that maximize growing space and create visual drama. Start with a wider base level, then add subsequent tiers by offsetting blocks inward to create a stepped pyramid effect. Secure tiers with construction adhesive for stability. These multi-level designs allow you to separate different plant types based on watering needs or create microclimates within your garden. The tiered structure also improves drainage, reduces back strain during maintenance, and creates natural seating edges. Consider placing heat-loving plants on the south-facing tiers and shade-preferring varieties on the north side to optimize growing conditions throughout your garden.
Creating Vertical Gardens Using Cinder Blocks

Vertical gardens made from cinder blocks offer an excellent solution for maximizing growing space in limited areas. These versatile structures allow you to grow upward rather than outward, making them perfect for urban gardens, small patios, or anywhere you want to add greenery without sacrificing floor space.
Recommended Products

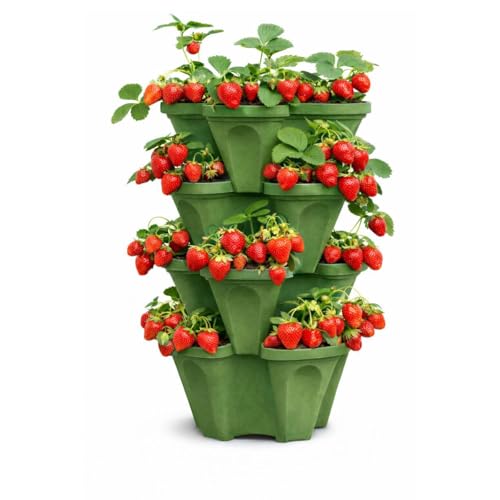
Grow 16 Plants in Just 1 Square Foot Maximize your harvest with this vertical planter tower featuring 4 stackable tiers and 16 planting sites. Perfect for strawberries, herbs, lettuce, and small vegetables in tight spaces.

Grow 16 Plants in Just 1 Square Foot Maximize your harvest with this vertical planter tower featuring 4 stackable tiers and 16 planting sites. Perfect for strawberries, herbs, lettuce, and small vegetables in tight spaces.

Space-Saving Vertical Gardening: Maximize your growing potential with staggered tiered planting! By smartly utilizing vertical space through height-varied layers, this planter lets you grow more plants while saving precious floor space—good for compact balconies, cozy patios, or tight indoor corners.
Wall-Mounted Planters for Small Spaces
Transform your bare walls into thriving gardens by mounting cinder blocks as planters. Start by securing blocks to your wall using construction adhesive and masonry screws, ensuring they’re anchored to studs or solid masonry for proper support. Arrange blocks in alternating patterns to create visual interest, with some blocks positioned horizontally and others vertically. Each block cavity becomes a planting pocket perfect for herbs, succulents, or trailing plants like ivy and strawberries. For better drainage, line the cavities with industry fabric before adding soil. Wall-mounted cinder block planters work exceptionally well on fence lines, against garden sheds, or on balcony walls where ground space is limited.
Freestanding Vertical Gardens for Visual Impact
Create stunning freestanding vertical gardens by stacking cinder blocks in a stepped or pyramid formation. Begin with a wide, stable base and gradually reduce the number of blocks as you build upward. Stagger the blocks to create planting pockets on multiple levels, ensuring each layer is securely positioned. For added stability in taller structures, consider using construction adhesive between layers or inserting rebar through the block cavities. These freestanding structures serve as excellent room dividers in larger gardens or as focal points in corners. Plant cascading flowers like petunias or calibrachoa in upper levels, drought-resistant plants in middle sections, and taller plants like ornamental grasses at the base for a ever-changing, multi-dimensional display that attracts beneficial pollinators while maximizing your growing space.
Designing Cinder Block Herb Gardens

Cinder blocks are perfect for creating dedicated herb gardens that combine functionality with aesthetic appeal. Their modular nature and built-in planting holes make them ideal for organizing different herb varieties while maximizing limited space.
Recommended Products

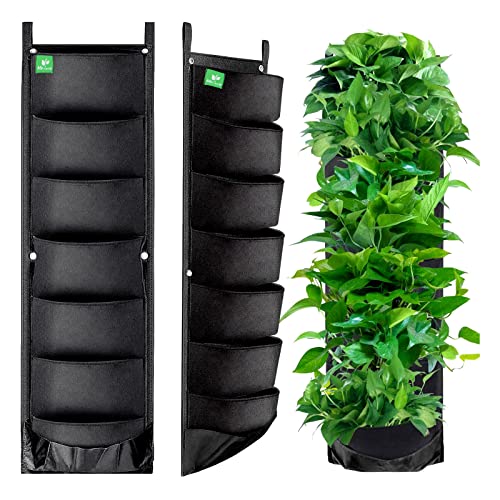
PREMIUM MATERIAL & WATER-PRESERVING REAR DESIGN - The hanging garden growth bag is made of high-quality and environmentally friendly felt. Practically, this growing bag retain a moderate water level for perfect growing conditions for your plants, such as herbs, strawberries, flowers, vegetables and so on. The rear water-preserving layer of the growing bag effectively protects the wall without stains, and the leakproof design of the bottom does not make your floor dirty.

Enough Planting Space: According to most of the buyers' suggestions for improvement, the number of pockets in the hanging planter has been changed from 7 to 6, which increases the growing space in each pocket, and provide a better growing environment for the plants to grow more vibrantly.

Stylish Living Wall Plant Décor: Vertical gardening is a fundamental technique to maximize space in small areas. This decorative hanging wall planter is perfect for small spaces, balconies, or patios. Essential use both indoors and outdoor.
Kitchen-Adjacent Herb Stations
Create convenient herb stations right outside your kitchen door using cinder blocks for easy access while cooking. Arrange blocks in a U-shape or straight line against a wall, positioning them at comfortable reaching height to eliminate bending. Fill the cavities with different culinary herbs like basil, rosemary, thyme, and mint, keeping similar light and water needs grouped together. For visual appeal, paint the blocks in complementary colors that match your home’s exterior or add ceramic tiles to the exposed faces. These kitchen-adjacent stations ensure fresh herbs are just steps away when preparing meals, while the concrete helps regulate soil temperature for consistent herb growth throughout the season.
Decorative Herb Spirals
Transform ordinary cinder blocks into eye-catching herb spirals that serve as functional garden focal points. Start by arranging blocks in a spiral pattern that rises from ground level to about three feet high, creating multiple growing zones with varying sun exposure and moisture levels. Position moisture-loving herbs like mint and parsley at the bottom where water naturally collects, place Mediterranean herbs like rosemary and thyme in the middle tiers, and situate sun-lovers like basil and sage at the top. The spiral design naturally creates microclimates that benefit different herb varieties while adding architectural interest to your garden. Paint or stain the exterior blocks in earthy tones to enhance the spiral’s visual appeal, or leave them natural and allow climbing herbs to cascade over the edges for a softer look.
Constructing Sturdy Cinder Block Outdoor Furniture

Recommended Products

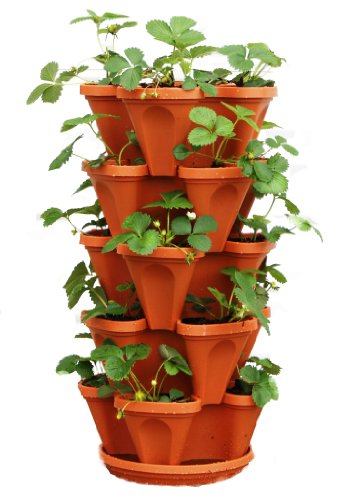
【3 Tiered Strawberry Planter】: You will receive 3 tiered strawberry planter , the trawberry planters sizes are 24 x 24x 11.8inch x 1,36 * 36 * 11.8 inch ,48 * 48 * 11.8 inch.Very suitable for growing vegetables, plants, flowers, fruits.
L: 12" W: 12" H: 28"; 25 Quart Soil Volume
Grow 16 Plants in Just 1 Square Foot Maximize your harvest with this vertical planter tower featuring 4 stackable tiers and 16 planting sites. Perfect for strawberries, herbs, lettuce, and small vegetables in tight spaces.
Benches and Seating Areas
Cinder blocks offer an affordable solution for creating durable outdoor seating that withstands the elements year after year. Start by arranging blocks in an “L” or “U” shape for corner seating, or create a straight bench against a garden wall. For a basic bench, place blocks side by side in two parallel rows, leaving space for wooden beams to span across as the seat. Secure 4×4 pressure-treated lumber or cedar planks (approximately 2 inches thick) across the blocks for comfortable seating. Enhance comfort by adding weather-resistant cushions in vibrant colors that complement your garden palette. For permanent installations, consider using construction adhesive between blocks to prevent shifting. These benches double as practical storage space—place garden tools, spare pots, or watering cans underneath to maximize functionality.
Tables and Plant Display Stands
Transform your garden space with multi-functional cinder block tables that serve as both gathering spots and plant displays. Create a simple coffee table by arranging four stacks of two blocks each in a square formation, then top with a piece of finished plywood, tempered glass, or a concrete slab. For plant display stands, stack blocks in a stepped configuration to create different height levels for showcasing container plants. Alternate block directions in a checkerboard pattern for a more architectural look that provides multiple planting pockets. These structures work perfectly beside seating areas or as standalone focal points on patios. For added stability in windy areas, fill some of the block cavities with soil and plant cascading flowers or herbs that will eventually soften the industrial appearance of the blocks. The beauty of these designs lies in their adaptability—you can easily reconfigure them as your garden needs change throughout the seasons.
Establishing Cinder Block Garden Borders and Edging

Cinder blocks excel as garden borders and edging materials, offering both durability and design flexibility. These versatile concrete blocks can define garden spaces while adding structural interest to your industry.
Recommended Products
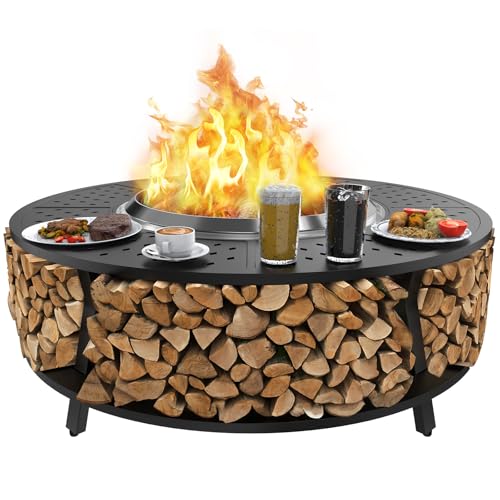
【DESIGN FOR YOUR FIRE PIT】- The inner diameter of the Fire Pit Surround Tabletop is 28 inches. Specifically designed for the solo stove fire pit. It perfectly matches your Yukon, Bonfire or Ranger fire pit and seamlessly connects with your existing fire pit accessories. Moreover, it is also perfectly compatible with TIKI BRAND smokeless 20-inch, 25-inch, and 27.5-inch fire pits, providing you with more options

360° Safety Shield :360° Fire Pit Surround Tabletop for Solo Stove Bonfire (Fits 15"-23" Models), preventing accidental burns. Enjoy peace of mind while children and pets play near the fire pit.

Protective Safety Barrier: 360 protective surface design and with the fence design around the outside, which supply a safety barrier to protect children and your pets from getting burned
Decorative Border Designs
Transform ordinary garden boundaries into eye-catching features with decorative cinder block borders. Create a scalloped edge by placing blocks in a curved pattern, alternating their orientation for visual rhythm. Paint your blocks in complementary colors to match your home’s exterior or garden theme—terracotta tones work beautifully in Mediterranean-style gardens, while cool blues complement coastal landscapes. For added interest, install blocks at varying heights to create an undulating border that draws the eye. Fill some block cavities with colorful annuals like marigolds or petunias while leaving others empty for an artistic pattern. For nighttime appeal, insert solar garden lights into strategic block openings to illuminate pathways and highlight garden features after sunset.
Functional Lawn Edging Answers
Install practical cinder block edging to create clean divisions between your lawn and garden beds. Position blocks horizontally in a trench dug 2-3 inches deep along your desired border line, ensuring they sit half-buried for mower-friendly edges that eliminate string trimmer work. For sloped areas, stagger blocks to create natural terracing that prevents soil erosion while adding dimension to your industry. Use cinder block edging to contain mulch and prevent it from spilling onto lawns or walkways. For vegetable gardens, arrange blocks vertically to create deeper barriers that deter burrowing pests like rabbits or groundhogs. In high-traffic areas, consider using construction adhesive between blocks for additional stability against foot traffic or garden equipment. These sturdy edges not only define your spaces clearly but also simplify maintenance throughout the growing season.
Building Water Features With Cinder Blocks

Cinder blocks make exceptional building materials for water features that add tranquility and visual interest to your garden. These affordable concrete blocks can be transformed into stunning fountains and ponds with minimal effort and materials.
Recommended Products

【Perfect Fit for Yukon & More】- Designed with a 28" inner diameter to fit Solo Stove Yukon, also compatible with Bonfire, Ranger, and TIKI smokeless fire pits. Brackets keep your fire pit securely centered.

Safety protection barrier: This bonfire surround for solo stove bonfire accessories features a 360° circular design on the tabletop. The bottom is equipped with heat insulation protection,bonfire surround for solo stove providing a safety barrier for children and your pets to avoid burns.
Simple Fountain Ideas
Create a striking tabletop fountain using just a few cinder blocks, a submersible pump, and decorative stones. Stack three blocks in a column, threading the pump cord through the center holes, and place a shallow basin on top to collect water. The pump will circulate water from a hidden reservoir in the bottom block up through the column for a soothing cascading effect. You can enhance your fountain by embedding colorful glass tiles on the exterior or planting moss in the side cavities for a naturalistic look. For larger spaces, build a tiered fountain by arranging blocks in a pyramid formation, allowing water to flow from the top basin down through multiple levels before being recirculated.
Mini Pond Constructions
Transform cinder blocks into a charming mini pond that attracts beneficial wildlife to your garden. Arrange blocks in a square or rectangular formation two layers high, securing them with construction adhesive between layers. Line the interior with heavy-duty pond liner that extends up and over the top edge of the blocks. Fill the bottom with a thin layer of gravel before adding water and aquatic plants like water lilies or lotus. The block cavities around the perimeter make perfect planting pockets for moisture-loving plants such as ferns, hostas, or Japanese iris. You can also incorporate a small recirculating pump to create gentle water movement, preventing mosquito breeding while adding the peaceful sound of moving water to your garden sanctuary.
Creating Cinder Block Fire Pits and Cooking Areas

Cinder blocks are ideal materials for building outdoor cooking spaces that combine durability with affordability. Their heat-resistant properties make them perfect for constructing fire pits and cooking areas that can withstand high temperatures while adding functional charm to your garden.
Recommended Products

Discover the ergonomic elegance of our oval design—engineered for stress-free gardening and visual appeal. Raised flower bed features a heavy-duty construction using secure clamps and bolts, making it the best choice raised garden bed for hassle-free assembling and long-term garden fun, even for beginners or seniors.

BEGIN YOUR GARDEN JOURNEY: This 8x4x1ft galvanized raised garden bed has all the needs in gardening! Thickened sheets and durable structure build a ideal environment for vegetables or plants. Also there are multiple sizes and colors you can choose to fit your gardens!
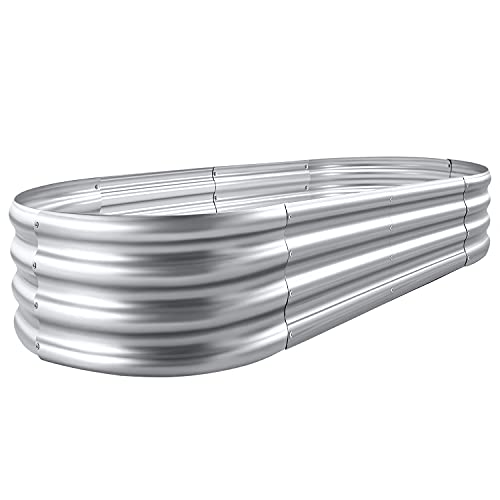
Each raised metal garden bed size: 4×2×1ft ,7.14Cu
Safe Fire Pit Designs
Transform your backyard into a cozy gathering spot with a DIY cinder block fire pit. Start by selecting a flat, open area at least 25 feet away from structures and overhanging trees. Arrange 12-16 cinder blocks in a circle or square pattern, placing them tightly together. For added stability, create a double-layer design by adding a second tier with blocks positioned to overlap the joints of the first layer. Line the bottom with 2-3 inches of gravel for drainage and fire safety. For a more finished look, cap the top layer with concrete pavers that extend slightly inward. Always check local building codes before construction as some areas require fire pit permits or have exact installation requirements. This simple weekend project costs about $50-75 in materials but provides endless evenings of outdoor enjoyment.
Outdoor Grill and Oven Structures
Elevate your garden’s functionality with a custom cinder block cooking station. Create a basic grill surround by arranging blocks in a U-shape, three blocks high, leaving the front open for access. Insert steel grates between layers to create cooking surfaces at different heights. For a more advanced project, build a cinder block pizza oven by constructing a domed chamber with firebricks inside and cinder blocks as the outer structure. Add a chimney using half blocks for proper ventilation. Include counter space on either side using blocks topped with concrete or stone slabs for food preparation. These structures typically cost $100-300 depending on complexity but offer years of outdoor cooking enjoyment. The thermal mass of cinder blocks provides excellent heat retention, maintaining consistent cooking temperatures while requiring minimal maintenance. Personalize your cooking area with herb planters in the hollow openings of peripheral blocks for convenient access to fresh seasonings while preparing meals.
Developing Cinder Block Compost Bins and Storage

Cinder blocks offer robust answers for garden waste management and tool organization, combining practicality with durability. Their modular nature allows you to create customized systems that grow with your gardening needs while maintaining aesthetic appeal.
Recommended Products

[Deep Vertical Garden Planter Pockets] - Built with Felt Fabric material, the 6 spacious, strong pockets each measure 7" L x 5" W x 8" H. The strong, liquid-absorbing fabric combined with the heavy-duty grommets make each pocket formidable and supportive for soil, water, plants, fruits, vegetables and more. Comes with 1 hanging planter. The full grow bag measures 8.5" L x 5.5" W x 54" H and acts as a living wall.

Transform Your Outdoor Wall Decor with this sleek metal planter measuring 16x5.1x5.1 inches! Crafted from rust-resistant metal, it thrives in rain or shine, making it perfect for wall planters for outdoor plants. Dual wall mount and hook mount options let you style patios, balconies, or indoor herb gardens effortlessly.
Practical Compost Systems
Cinder blocks make excellent compost bins due to their strength and ability to retain heat necessary for decomposition. To build a basic compost system, arrange 12-16 blocks in a square or rectangular formation, leaving small gaps between some blocks for airflow. You can create multiple adjacent compartments—one for fresh materials, another for decomposing matter, and a third for finished compost ready for garden use. The hollow cores of the blocks increase ventilation, speeding up the decomposition process while maintaining temperature. For a more sophisticated system, stack blocks two or three levels high and insert wooden slats in front to create removable doors for easy access when turning compost or harvesting finished material. The thermal mass of cinder blocks helps maintain consistent temperatures, making your compost process more efficient even in fluctuating weather conditions.
Garden Tool Organization Answers
Transform unused garden corners into functional tool storage areas with cinder block arrangements. Create a simple tool organizer by placing blocks in a row with holes facing upward—perfect for storing long-handled tools like rakes, shovels, and hoes. For smaller tools, build a multi-tiered shelf system by staggering blocks in a pyramid formation, using the cavities and surfaces for storing pruners, trowels, and gloves. Enhance functionality by incorporating a potting station with blocks arranged in an L-shape: the lower level serves as storage while the upper level creates a comfortable working height for potting plants. Add wooden boards across strategically placed blocks to create weather-resistant shelving for seed packets, plant markers, and other gardening essentials. These storage answers not only keep your garden organized but also protect tools from moisture and extend their usable life.
Implementing Cinder Block Pathways and Stepping Stones

Cinder blocks offer an affordable and durable solution for creating distinctive pathways throughout your garden. These versatile concrete blocks can transform muddy trails into stable walkways while adding architectural interest to your outdoor space.
Inlaid Garden Paths
Create practical garden paths by partially burying cinder blocks in the ground to form a solid walking surface. Dig a shallow trench about 2-3 inches deep and slightly wider than your blocks, then add a layer of sand for drainage and stability. Position the blocks with their hollow sides facing down and press them firmly into place. You can arrange them in a straight line for formal gardens or create gentle curves for a more natural look. Fill the spaces between blocks with decorative gravel, crushed stone, or ground cover plants like creeping thyme or moss to soften the appearance. These inlaid paths not only prevent muddy shoes during rainy seasons but also clearly define garden areas while creating a cohesive design element throughout your industry.
Decorative Walkway Patterns
Transform ordinary garden walkways into artistic statements by arranging cinder blocks in creative patterns. Try alternating blocks in a checkerboard design, creating a herringbone pattern, or positioning them in a basket weave formation for visual interest. Paint your cinder blocks in complementary colors or use stencils to add custom designs that match your garden’s aesthetic. For added functionality, place blocks with their hollow sides facing up in selected areas and fill these openings with soil to grow low-growing plants like sedums or Irish moss. These planted pockets break up the concrete’s visual weight while adding bursts of greenery along your path. For evening ambiance, insert solar-powered lights into some of the cavities to illuminate your walkway after sunset, creating a magical garden experience that’s both practical and beautiful.
Painting and Decorating Cinder Blocks for Garden Appeal
Cinder blocks offer endless possibilities for transforming your outdoor space into a functional yet beautiful garden. From raised beds to vertical gardens water features to outdoor cooking areas these versatile building blocks can truly do it all. Their affordability durability and weather resistance make them perfect for DIY gardeners of any skill level.
Whether you’re maximizing limited space with vertical planters creating comfortable seating areas or building practical storage answers cinder blocks adapt to your needs. You’ll find they work equally well for edging pathways building water features or constructing fire pits.
The beauty of cinder block gardening lies in its accessibility – you don’t need specialized tools or extensive construction experience to create something remarkable. Start with a simple project then let your imagination guide you toward a garden that’s uniquely yours with these humble yet mighty building blocks.
Recommended Products

Size: Accessories for 2 complete garden beds in one box!!! 72"(L) x 36"(W) x 12"(H), growing area of this garden bed perfect for an array of vegetables, herbs, and flowers in your yard

4x4x1 FT Round Raised Garden Bed: Round galvanized steel raised garden bed with a 12-inch internal growing depth, designed as an outdoor raised garden bed for vegetables and herbs in backyards, patios, and home gardens

SIZE: The plant bed measure is 46"L x 23.6"W x 11.8"H. This planter box provide ample growing space to raise vegetables, flowers and plants.